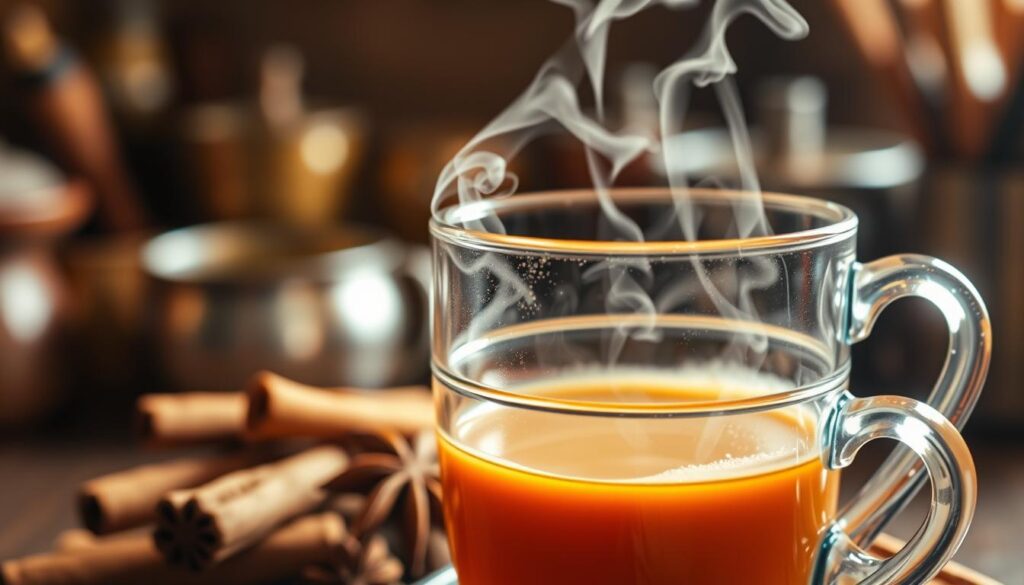
How to Make Rosemary Oil: Quick Guide for Beginners
Last Updated: May 2026
Jump to Recipe | Cold Infusion Recipe | Heat Infusion Recipe | Hair Care Recipes
⚡ QUICK ANSWER
How to make rosemary oil at home?
Two methods, both simple. Here’s what you need to know before starting:
moisture = mould risk
to 3 parts carrier oil
light degrades the oil
or 2–3 hours with heat
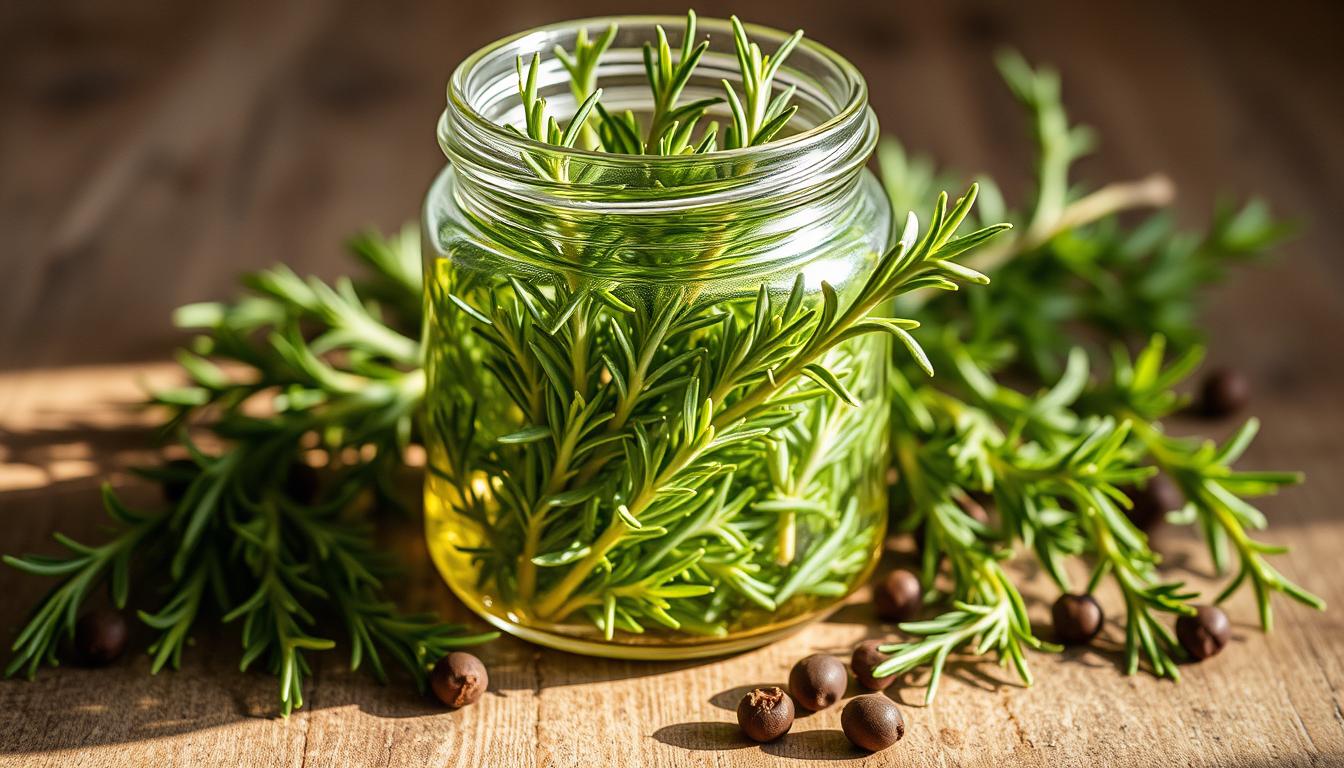
Fastest start (cold method): Combine 1/4 cup dried rosemary + 1 cup carrier oil in a clean glass jar. Seal, shake, store in a cool dark place. Shake daily. Strain after 4 weeks. Ready to use for up to 12 months.
🔍 DEFINITION — ROSEMARY OIL (INFUSED)
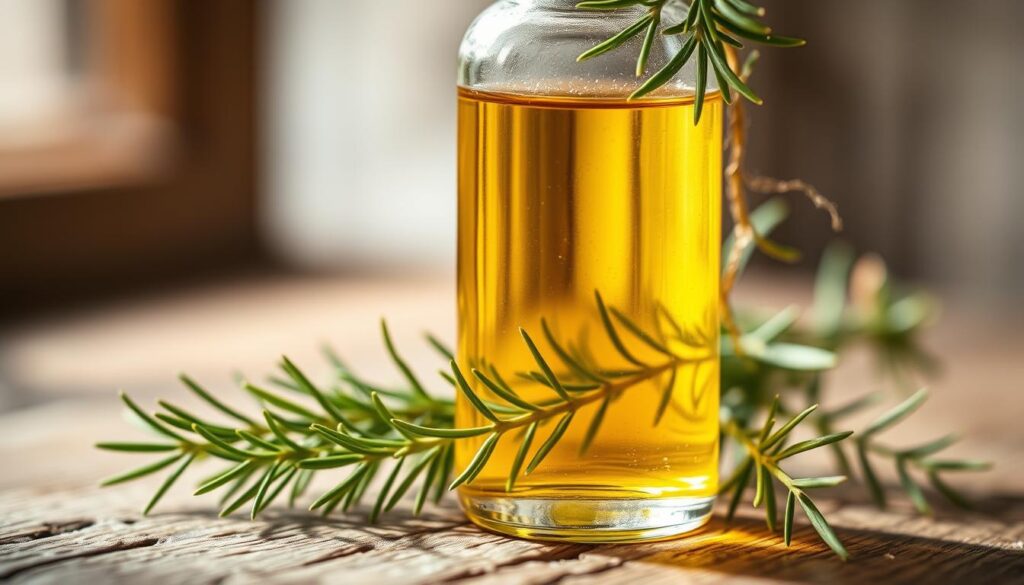
Rosemary oil (also called rosemary-infused oil) is a botanical preparation made by steeping dried rosemary leaves (Rosmarinus officinalis) in a carrier oil — typically olive, coconut, or jojoba — for 2 to 6 weeks. The carrier oil gradually absorbs rosemary’s active compounds including carnosic acid, rosmarinic acid, and natural volatile oils.
This is distinct from rosemary essential oil — which is steam-distilled, used at 2–3 drops maximum, and added to shampoo or other products. Rosemary-infused oil is used at full concentration — 1–2 tablespoons — for scalp massage, hair masks, and pre-wash treatments.
Key facts: Use completely dried rosemary only · Standard ratio 1:3 herb to oil · Cold method: 4–6 weeks · Heat method: 2–3 hours · Shelf life: 6–12 months in dark glass.
⬇ JUMP TO SECTION
📋 FULL CHEAT SHEET — HOW TO MAKE ROSEMARY OIL
| Method | Time | Ratio | Best Carrier Oil | Shelf Life |
|---|---|---|---|---|
| Cold infusion ⭐ | 4–6 weeks | 1:3 herb to oil | Jojoba or olive | 12 months |
| Heat (double boiler) | 2–3 hours | 1:3 herb to oil | Olive or coconut | 6–9 months |
| Solar infusion | 2–4 weeks | 1:3 herb to oil | Any | 6–12 months |
| For hair care use | 1–2 tbsp per application | Undiluted | Coconut or olive | 30–60 min leave-on |
| For shampoo boost | Immediate | — | See dedicated guide → | Essential oil only |
| Storage (finished) | — | — | Dark glass bottle | Cool, dark place |
$7 homemade vs $10–20 store-bought per batch.
4–6 weeks cold infusion, or 2–3 hours with gentle heat.
Cold-infused in dark glass, stored correctly.
No synthetic preservatives, fragrances or fillers.
Quick Answer: How to make rosemary oil? To make rosemary oil at home, combine 1/4 cup dried rosemary with 1 cup carrier oil (olive, coconut, or jojoba) in a glass jar. For cold infusion, store in a dark place for 2-4 weeks, shaking daily. For quick infusion, gently heat using a double boiler for 2-3 hours at 100-120°F. Strain and store in dark glass bottles for up to 12 months.
Learning how to make rosemary oil at home opens up a world of possibilities for your personal care routine. This aromatic botanical infusion has been valued for generations as a versatile addition to both culinary creations and beauty regimens. When you make rosemary oil yourself, you control every ingredient, ensuring a pure, chemical-free product tailored to your specific needs.
Creating your own rosemary-infused oil is remarkably straightforward—you’ll simply steep fresh or dried rosemary leaves in your preferred carrier oil. The result is a fragrant, nutrient-rich infusion that integrates beautifully into natural haircare routines and natural skincare practices. Whether you’re interested in how to make rosemary oil for hair or how to make oil from rosemary plants for body care, this comprehensive guide walks you through each step.
This post contains affiliate links.
At a Glance:
- ⏱️ Cold Infusion: 2-6 weeks | Best for maximum potency
- ⚡ Quick Method: 2-3 hours | Ready same day
- 💰 Cost: $7 homemade vs $10-20 store-bought
- 📦 Shelf Life: 6-12 months properly stored
- 🌿 Best Uses: Hair care, scalp health, skincare, aromatherapy
Benefits of Homemade Rosemary Oil
Key Takeaways:
- ✅ 100% natural, no synthetic additives or preservatives
- ✅ 70% cost savings compared to commercial products
- ✅ Customizable potency and carrier oil selection
- ✅ Fresher than store-bought alternatives
- ✅ Multipurpose use: hair, skin, aromatherapy
Creating rosemary oil in your own kitchen delivers impressive advantages, from preserving the herb’s natural characteristics to significant savings compared to commercial alternatives. This DIY approach empowers you to craft a personalized infusion that aligns perfectly with your herbal wellness goals.
Natural properties of rosemary
When you prepare rosemary oil at home, you preserve the herb’s inherent qualities in their purest form. The infusion process captures rosemary’s characteristic compounds—including carnosic acid, rosmarinic acid, and essential volatile oils—that contribute to the herb’s reputation in traditional beauty practices. Your homemade version remains free from synthetic fragrances, petroleum-based fillers, stabilizers, and artificial preservatives commonly found in mass-produced products.
Rosemary has been cherished across cultures for centuries. Its woody, pine-like aroma provides an invigorating sensory experience, while its traditional uses span from culinary seasoning to topical applications. When infused properly, the resulting oil carries these botanical properties forward, creating a multi-purpose product suitable for scalp support, skin moisturizing, and aromatherapy.
Cost-Effectiveness vs. Store-Bought Options
The financial benefits of making your own rosemary oil become clear when comparing ingredient costs to retail prices:
| Item | Cost for Homemade | Cost for Store-Bought |
|---|---|---|
| Rosemary | $2 (fresh or dried) | $10-$20 (per bottle) |
| Carrier Oil | $5 (per bottle) | Included in retail price |
| Total | $7 (makes multiple batches) | $10-$20 (single bottle) |
This comparison reveals substantial savings—your initial $7 investment yields enough materials to create several batches of rosemary oil, while a single commercial bottle typically costs $10-$20. Over time, these savings accumulate significantly, especially if you use rosemary oil regularly in your natural body care routine.
Beyond monetary savings, homemade rosemary oil offers customization that pre-made products cannot match. You select the carrier oil that best suits your hair type or skin needs, adjust the rosemary concentration for desired potency, and ensure absolute freshness with each new batch.
How to Make Rosemary Oil: Essential Ingredients and Tools
Starting your journey of how to make oil with rosemary requires minimal supplies—just quality botanicals and basic kitchen equipment. The right foundation ingredients determine your final product’s effectiveness and longevity.
Advanced Tools for Herbal Infusions (Optional)
While traditional methods work beautifully for occasional batches, some enthusiasts who regularly create herbal infusions invest in specialized equipment to streamline the process. Dedicated infusion machines automate temperature control and timing, which proves convenient for those preparing larger quantities or experimenting with multiple herbal blends simultaneously.
View Magical Butter MB2E Herbal Infusion Machine on Amazon
Amazon Disclosure:
As an Amazon Associate, I earn from qualifying purchases.
These machines are entirely optional—the traditional jar method works perfectly well for beginners and provides excellent results.
Selecting Quality Rosemary
Your rosemary oil’s potency begins with the herb itself. When selecting rosemary, prioritize stems with vibrant green leaves that release a strong, pleasant aroma when gently rubbed between your fingers. Avoid any sprigs showing brown discoloration, wilting, or musty odors, as these indicate age or improper storage.
Fresh rosemary from your garden or farmers market offers peak vitality, though it requires proper drying before infusion to prevent moisture-related spoilage. Alternatively, high-quality dried rosemary from reputable suppliers provides consistency and convenience—the dehydration process is already complete, and the herb stores easily for months.
For those growing their own herbs, harvest rosemary from established plants that haven’t been treated with pesticides or chemical fertilizers. Organic rosemary ensures your infusion remains completely natural from start to finish.
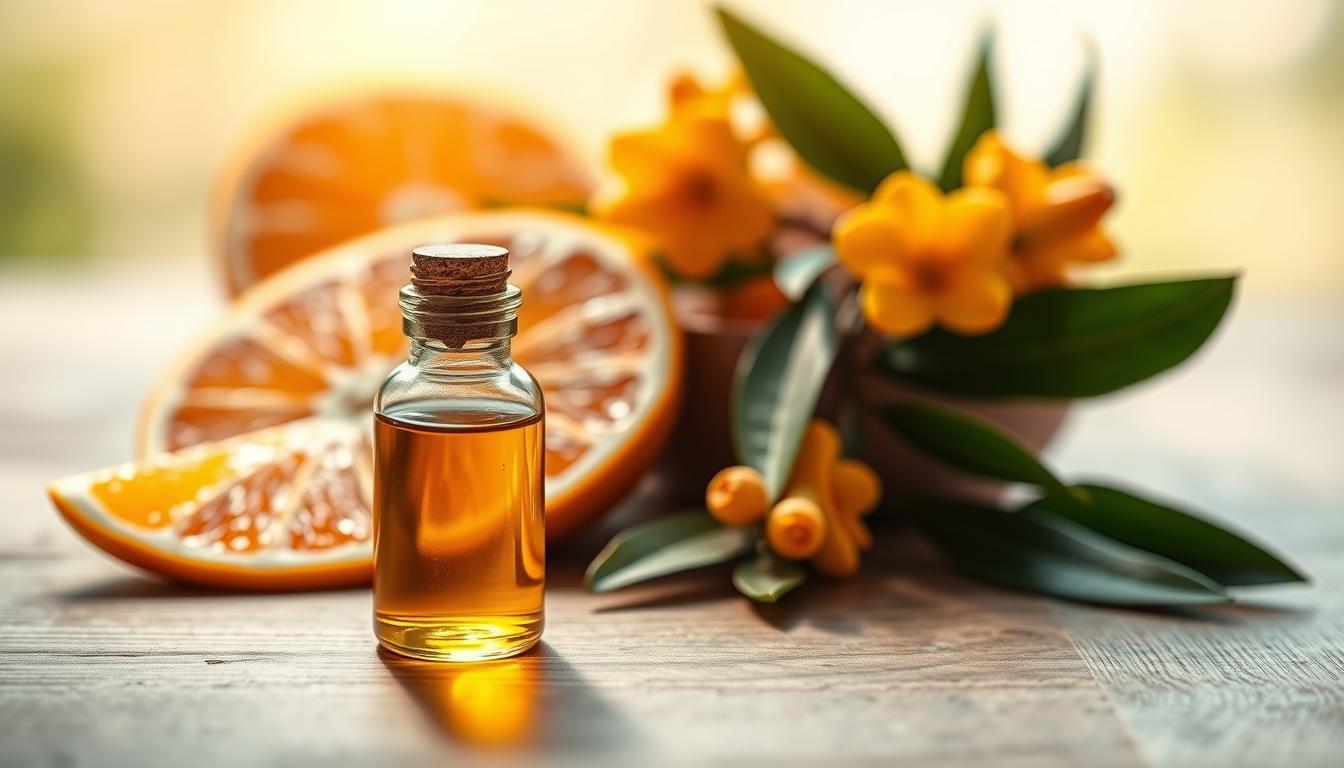
Choosing the Right Carrier Oil
Carrier oils dilute and transport rosemary’s concentrated compounds, making them safe for topical application. Each carrier oil brings distinct benefits:
Olive Oil: A kitchen staple that’s readily available and affordable. Extra virgin olive oil contains beneficial fatty acids and works beautifully for both culinary and cosmetic applications. Its slightly heavier texture makes it ideal for scalp support and intensive hair applications.
Coconut Oil: Solid at room temperature but melts upon contact with skin. Virgin coconut oil penetrates hair shafts effectively and provides lightweight moisture. It’s particularly popular in natural haircare formulations. See how it pairs with other haircare approaches in our coconut oil for hair guide.
Jojoba Oil: Technically a liquid wax ester that closely mimics skin’s natural sebum. Jojoba absorbs quickly without leaving greasy residue, making it excellent for facial applications and scalp care. Its long shelf life also helps preserve your rosemary infusion.
Sweet Almond Oil: Light, easily absorbed, and suitable for most skin types. This gentle carrier oil works well when you’re creating rosemary oil for full-body moisturizing or massage.
Choose your carrier oil based on your primary intended use. For how to make rosemary oil for hair applications, coconut or olive oil typically performs best. For natural skincare purposes, jojoba or sweet almond oil may be preferable.
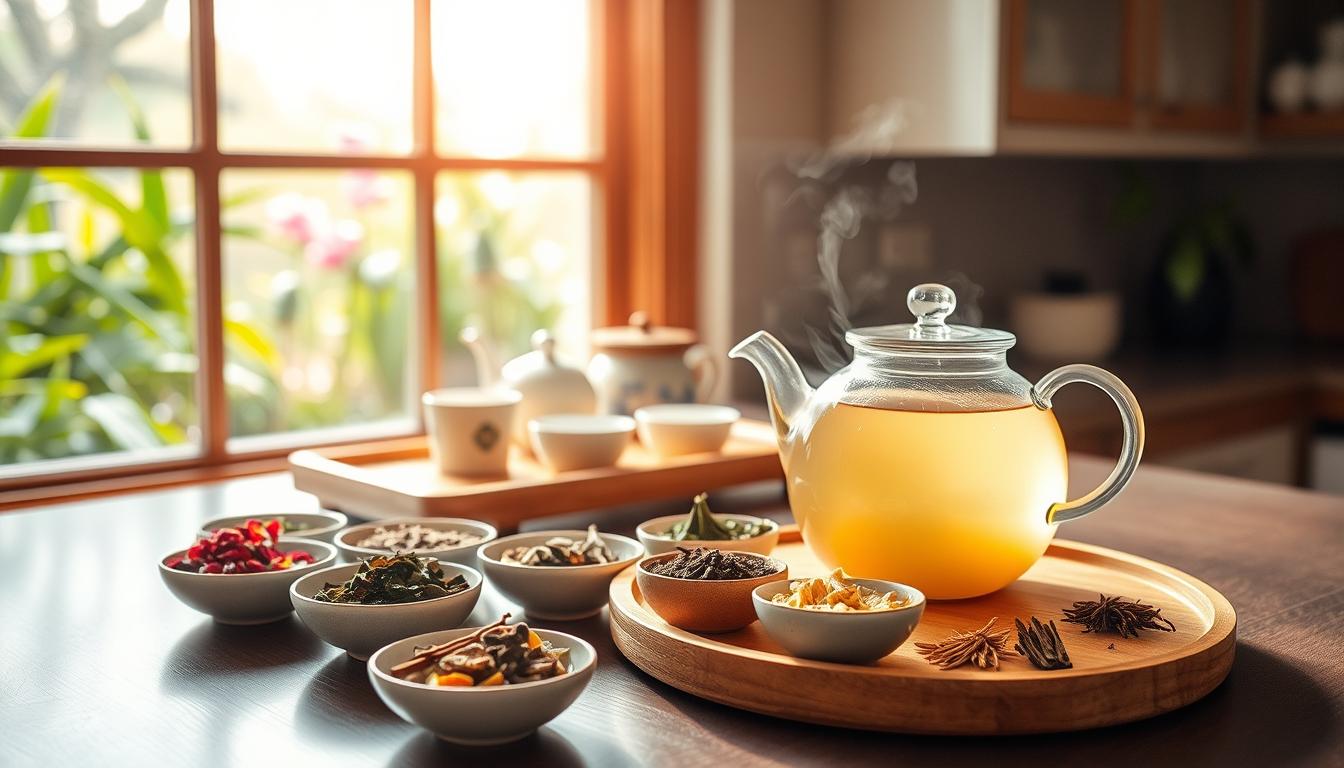
Equipment Needed
Gather these basic supplies before beginning:
| Equipment | Purpose |
|---|---|
| Mason Jar | Primary vessel for infusing rosemary in carrier oil; clear glass allows monitoring |
| Measuring Cup | Ensures accurate ratios of herbs to oil for optimal potency |
| Cheesecloth or Fine-Mesh Strainer | Filters out plant material, leaving only pure infused oil |
| Dark Glass Bottles | Final storage containers that protect oil from light degradation |
| Funnel | Simplifies transfer of finished oil into storage bottles |
| Labels | Tracks preparation date and ingredients for freshness monitoring |
Most households already have these items, making this project accessible without special purchases.

Preparing Your Rosemary
Proper preparation of your rosemary directly influences the quality, safety, and effectiveness of your finished oil. This stage removes potential contaminants and optimizes the herb’s surface area for maximum infusion.
When working with fresh rosemary, gently breaking down the leaves before infusion helps release the plant’s aromatic compounds and improves oil penetration.
Harvesting Fresh Rosemary
If you’re growing rosemary at home, harvest during peak vitality for the most potent infusion. The optimal harvesting window occurs mid-morning—after dew has evaporated but before intense midday heat diminishes the plant’s volatile oils.
Select stems that appear healthy, with firm leaves showing vibrant green color and no brown spotting. Using clean, sharp pruning shears or scissors, cut stems just above a leaf node. This pruning technique encourages bushier growth and provides more harvests throughout the growing season.
Cleaning and Drying Techniques
Freshly harvested or purchased rosemary may harbor dust, dirt particles, or tiny insects, making thorough cleaning essential:
- Initial rinse: Hold stems under cool running water, gently agitating leaves to dislodge debris
- Inspection: Examine leaves closely, removing any damaged, discolored, or spotted foliage
- Moisture removal: Shake stems vigorously to remove excess water, then pat gently with clean towels
- Air drying: This step is crucial for preventing mold in your oil infusion
Bundle hanging: Tie 4-6 stems together with twine and suspend upside down in a warm, dry location with good air circulation. This traditional method takes 1-2 weeks depending on humidity levels.
Flat drying: Spread individual leaves in a single layer on clean paper towels or drying screens. Rotate leaves daily to ensure even drying. This method typically completes in 5-7 days.
Using Dried vs. Fresh Rosemary
Both fresh and dried rosemary produce excellent infusions, though dried rosemary is recommended for beginners. Complete dryness before infusion is essential—moisture introduces bacterial or mold risk into your carrier oil. Fresh rosemary must be dried for 5–7 days minimum before use in any cold infusion method.
How to Make Rosemary Oil: Cold Infusion Method
The cold infusion technique represents the most traditional and gentlest approach to creating botanical oils. This patient process allows time for the carrier oil to thoroughly extract and absorb rosemary’s beneficial compounds without heat-induced degradation.
Step-by-Step Process
Tips for Best Results
Ensure complete submersion: Plant material floating above the oil line will oxidize and potentially develop mold. Add slightly more carrier oil if rosemary keeps floating.
Maintain sterile conditions: Any contamination introduced during preparation can compromise the entire batch. Wash hands thoroughly and ensure all equipment is clean and completely dry.
Consider double infusions: For an exceptionally potent batch, strain after 4 weeks and add fresh dried rosemary to the already-infused oil for a second 2-week infusion. This “twice-infused” method produces a noticeably more concentrated result.
Expected Timeline
Quick Heat Infusion Techniques
When you need rosemary oil more quickly than the cold infusion method allows, heat-based techniques offer faster alternatives. These approaches use gentle warming to accelerate the extraction process, producing usable oil within hours rather than weeks.
Stovetop Method
Place dried rosemary and carrier oil in a small saucepan on the lowest possible heat setting. Warm gently for 2–3 hours, stirring every 20–30 minutes. The oil should feel warm to the touch—never hot or bubbling. Temperature should stay between 100 and 120°F. Never leave unattended. Cool completely before straining.
Double Boiler Technique
The double boiler method provides more controlled, even heating. Fill a medium saucepan with 2–3 inches of water at a gentle simmer. Place rosemary and carrier oil in a heat-safe bowl on top. Stir occasionally. Maintain for 2–3 hours. The indirect steam prevents hot spots and provides gentle, even extraction—our preferred heat method for beginners.
Solar Infusion Alternative
Solar infusion bridges cold and heat techniques. Prepare the jar as for cold infusion, seal it, and place it in direct full sunlight for 2–4 weeks, shaking daily. The sun’s gentle warmth accelerates infusion compared to cool, dark storage. Best in warm climates or summer months—less reliable in overcast regions.
Using Rosemary Oil for Hair Growth and Care
Understanding how to make rosemary oil for hair—and specifically for scalp and hair growth support—opens new possibilities for natural hair maintenance routines. The preparation method remains consistent regardless of intended use—you simply focus on selecting a carrier oil that complements hair health. Lighter oils like jojoba penetrate easily for fine hair, while richer options like olive or coconut oil suit thicker, coarser textures.
💡 INFUSED OIL vs ESSENTIAL OIL — WHICH DO YOU NEED?
🫙 This guide — Infused Oil
- Carrier oil steeped with rosemary herb
- Used at 1–2 tbsp per application
- Scalp massage and pre-wash treatments
- Deep conditioning hair masks
- Added to conditioner for lengths
💧 Rosemary Oil Shampoo guide — Essential Oil
- Steam-distilled concentrated oil
- Used at 2–3 drops only per wash
- Added directly to shampoo
- Never used undiluted on scalp
- Different product, different use
Both use rosemary — but they are not interchangeable. The infused oil you make here is used for scalp massage and hair masks. For adding rosemary to your daily shampoo routine, see our dedicated rosemary oil shampoo guide which covers dosage, method and 3 DIY shampoo recipes.
What Research Shows About Rosemary for Scalp Health and Hair Growth
Research into rosemary’s effects on scalp wellness has produced encouraging findings, though it’s important to understand what the science actually shows. A 2015 study published in SKINmed compared rosemary oil to a commonly used scalp wellness product in individuals experiencing a particular type of hair thinning. After six months, both groups showed increases in hair count, with rosemary oil performing comparably. Participants using rosemary oil also reported less scalp discomfort than the comparison group.
What we can say with confidence: many people report positive experiences incorporating rosemary oil into their natural haircare routines, noting improvements in scalp comfort, hair appearance, and texture over time with consistent use. Results vary significantly between individuals, and anyone experiencing significant or sudden changes in hair should speak with a healthcare professional.
Application Methods for Hair Care
Integrating rosemary-infused oil into your hair care routine requires just a few simple techniques:
Scalp Massage (most effective): Combine 1–2 tablespoons of your rosemary-infused oil and warm slightly by rubbing between palms. Part hair into sections and massage directly onto scalp using gentle circular motions for 5–10 minutes. Leave on for at least 30 minutes, or overnight for a more intensive application, before washing out.
Shampoo enhancement: If you’d like to add rosemary to your daily shampoo routine, this works best using rosemary essential oil — not this infused oil — at a precise 1% concentration. We cover the exact method, dosage guide and 3 DIY shampoo recipes in our dedicated rosemary oil shampoo guide →
Conditioner Boost: Mix 1 teaspoon of rosemary-infused oil into your conditioner before applying. Apply as usual, allowing the conditioner to sit on hair for 3–5 minutes before rinsing.
Pre-Wash Treatment: Apply rosemary-infused oil generously to dry hair and scalp before washing. Cover with a shower cap and leave on for 30–60 minutes. This intensive pre-wash application allows maximum absorption time before cleansing removes excess oil. Pairs beautifully with the aloe vera hair mask approach detailed in our aloe vera hair mask guide.
Consistency matters more than intensity. Regular use two to three times weekly for scalp massage typically produces more noticeable results over time than occasional intensive applications.
DIY Hair Care with Rosemary Oil
The four recipes below use your homemade rosemary-infused oil as the active ingredient. Each is designed for a specific hair concern. Quantities are for shoulder-length hair—adjust proportionally for shorter or longer hair.
📖 Recipe 1: Deep Conditioning Rosemary Hair Mask
Prep Time: 5 minutes | Treatment Time: 30-60 minutes | Hair Type: All types, especially dry or damaged hair
📖 Recipe 2: Scalp-Soothing Rosemary & Olive Oil Application
Prep Time: 5 minutes | Treatment Time: 45-60 minutes | Best For: Scalp wellness and moisture balance
📖 Recipe 3: Leave-In Rosemary Hair & Scalp Tonic
Prep Time: 5 minutes | Yield: ~4 oz | Storage: Up to 4 weeks refrigerated | Best For: Daily scalp support
📖 Recipe 4: Intensive Rosemary Protein Hair Application
Prep Time: 10 minutes | Treatment Time: 20-30 minutes | Best For: Weak or chemically-processed hair
General Hair Recipe Tips
Fine hair: Reduce oil quantities by half to avoid weighing hair down. Thick/coarse hair: Increase by 50% for adequate coverage. Oily scalp: Focus applications on lengths and ends—avoid the scalp. Color-treated hair: Avoid recipes with apple cider vinegar, which can affect color vibrancy. Always section hair for even coverage. Use the coolest, most comfortable water for rinsing. Set a timer—never guess on application time.
These recipes work alongside your wider natural haircare routine. For a complete picture of how rosemary fits into a full weekly routine—including how to use rosemary essential oil in your daily shampoo—see our rosemary oil shampoo guide and our rosemary water for hair guide.
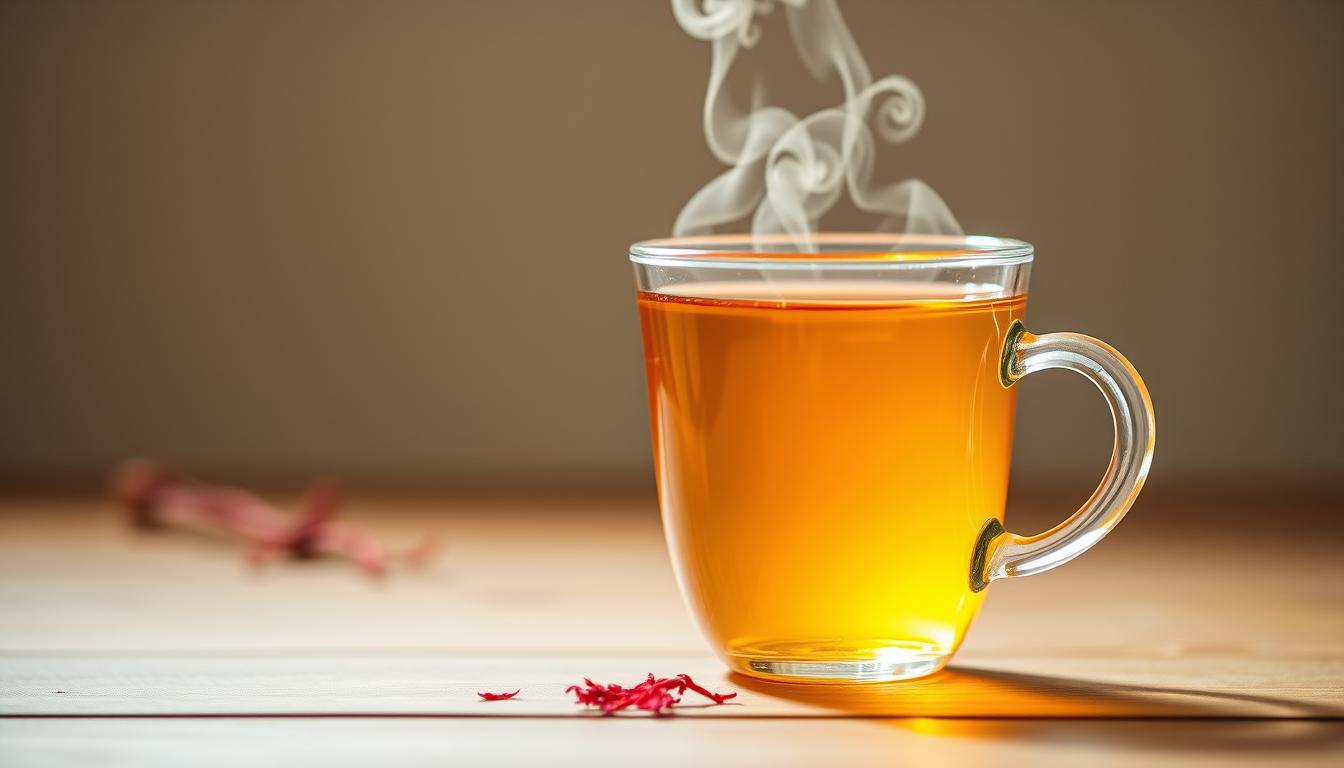
Storage, Shelf Life, and Troubleshooting
Proper storage dramatically extends your rosemary oil’s usability while maintaining its quality and effectiveness.
Proper Storage Containers and Conditions
Container selection: Always store finished rosemary oil in dark-colored glass bottles—amber, cobalt blue, or dark green. Clear glass allows light penetration, accelerating oxidation and reducing shelf life. Avoid plastic containers entirely.
Storage location: Cool, dark space at a consistent 60–75°F. Avoid windows, heat sources, humid bathrooms, and locations with temperature fluctuations. Refrigeration extends shelf life—particularly useful for oils made with less stable carriers like grapeseed or sweet almond oil.
View dark glass storage bottles on Amazon →
Amazon Disclosure: As an Amazon Associate, I earn from qualifying purchases.
How to Tell If Your Oil Has Gone Bad
Smell: Rancid odor (old nuts, crayons), musty or moldy scent, or complete loss of rosemary aroma—all indicate spoilage. Visual: Cloudiness at room temperature, visible mold, or unusual sediment. Texture: Unusually thick, sticky, or slimy consistency. When in doubt, discard and make a fresh batch.
Common Problems and Solutions
| Issue | Cause | Solution |
|---|---|---|
| Oil becomes cloudy | Cold temperature—natural waxes solidifying | Move to a warmer location. Cloudiness from cold clears at room temperature. Persistent cloudiness—check for mold. |
| Oil loses potency | Light, heat or oxygen exposure | Transfer to dark glass. Store in a consistently cool and dark place. Use within shelf life. |
| Off smell develops | Oxidation or moisture contamination | Discard batch. Ensure complete herb dryness for future batches. Sterile equipment always. |
| Mould during infusion | Moisture in rosemary or condensation | Discard immediately. Future batches: ensure rosemary is completely dry before adding to oil. |
| Weak scent after 4 weeks | Old rosemary or insufficient ratio | Extend infusion time or try a double infusion. Use more rosemary per cup of oil. |
| Rosemary floats | Natural buoyancy of dried herb | Press down daily. Add slightly more oil to ensure submersion. |
🧪 How We Made This Guide—Doo & Rita’s Experience
🌿 Our first batch was a failure
We used rosemary that hadn’t dried completely. By week two there was a faint but unmistakable mouldy smell. We discarded the whole batch. The drying step is not optional — that experience made it impossible to forget. Every batch since has started with rosemary dried for a minimum of 7 days.
⏱️ The 4-week vs 6-week difference
We made two batches simultaneously — one strained at 4 weeks, one at 6 weeks. The 6-week version had a deeper colour, a richer scent, and felt noticeably more active on the scalp during massage. If you’re not in a rush, the extra two weeks are worth it.
🫙 Jojoba vs olive oil — the real difference
Doo prefers jojoba — it absorbs cleanly with no greasy residue after the scalp massage. Rita prefers olive oil for the hair mask recipes because it’s richer and the ends feel more coated after rinsing. Both work well — it comes down to hair type and preferred texture.
💡 The double infusion discovery
After reading about herbalist double-infusion techniques, we tried straining a 4-week batch and adding fresh dried rosemary for a second 3-week infusion. The result was significantly more potent than either standard batch. If you use rosemary oil regularly, this is worth the extra step.
🧴 Why we keep two rosemary products
We use this infused oil for weekly scalp massages and hair masks. For our daily shampoo routine, we use rosemary essential oil at 2–3 drops per wash — a completely different product and application. Both have their place. See our rosemary oil shampoo guide for the shampoo approach.
📚 What the research says vs what we noticed
The SKINmed 2015 study used rosemary essential oil topically — not an infused carrier oil. The two products share active plant compounds but differ in concentration and delivery. Our experience with the infused oil has been positive for scalp comfort and hair texture over time — consistent with what the broader rosemary research suggests is possible.
Conclusion
Creating rosemary oil at home empowers you to take control of your natural body care routine with a versatile, multi-purpose botanical infusion. The process itself connects you with traditional herbal practices that have supported personal care for generations. Each batch you create is unique, tailored precisely to your preferences regarding carrier oil, infusion strength, and intended use.
The infused oil you make here works beautifully for scalp massage and hair masks. When you’re ready to extend your rosemary routine into your daily cleansing step, our rosemary oil shampoo guide covers how to use rosemary essential oil in your shampoo safely and effectively—a different product, but a natural next step in the same botanical routine.
Now that you understand how to make rosemary oil for hair—and how to use it for scalp support and hair growth conditions—you hold the knowledge to create this beneficial infusion whenever needed.
Affiliate Disclosure:
This article contains affiliate links. Purchases made through these links help support this website at no additional cost to you. As an Amazon Associate, I earn from qualifying purchases.
FAQ
Disclaimers and Disclosures
Note: The information in this article is for general lifestyle and cosmetic inspiration only. It is not intended to diagnose, treat, cure, or prevent any health condition. If you have a scalp concern, known allergies, or any skin sensitivities, please consult a qualified professional before changing your routine. Always patch test new formulas on the inner arm 24 hours before first use. Essential oils should never be applied undiluted to the scalp.
Affiliate Disclaimer: This article contains affiliate links to Amazon.com. As an Amazon Associate, we earn from qualifying purchases made through these links at no additional cost to you.
Doo and Rita are the creators of Nature’s Herbal Remedy, a plant-based haircare and wellness blog. They’ve been making rosemary-infused oil at home since 2022 — including one failed first batch that taught them the drying step is not optional. Every method, timeline and recipe in this guide comes from batches made in their own kitchen.